February Frosting
- Cora
- Feb 25, 2020
- 11 min read

Updated: Feb 25, 2020

I had been planning to make myself something special to wear to my graduation since I finished my dissertation in September. At first I had ear marked Named’s Solina Dress in tencel twill, and I bought 3m of Rose Dust from Merchant and Mills before Christmas in preparation.
When I had time to look at my plans again in late January after finishing David’s shirt, I wasn’t feeling a pink Solina anymore. The feminine shape of the dress felt even more feminine in pink and while I was inspired by the photos in Breaking the Pattern, it didn’t feel right. At that point I was still planning to use the tencel, but was trying to find another pattern to fit. I thought about Vogue 9253, which I have wanted to make since I joined sewing Instagram. I toiled the bodice but decided it was far too summery for a winter graduation. The fabric pattern combination is lovely so I think I will make it later in the year for a couple of special events coming in the summer.


I was back to the drawing board, thinking about how to make a dress more winter friendly but still feel special. A collared neck and long sleeves came to mind, and something to make the sleeves have a bit more interest. I love the sleeves on my I Am Jain, whose inserted elasticated gives some volume.
I was considering wearing my Atelier Brunette Winslow Culottes and making a top to tuck in, as I wanted a drapey wide legged silhouette and cinched in waist but I didn’t just want to repeat the outfit that I wore to the black tie event I originally made my Winslows for! When I think about making formal wear, I become very preoccupied with how wearable and versatile the piece will be past the event, as I don't do formal things that often. I was therefore considering a co-ord set for this reason but I'm so glad @the.weekend.sewist encouraged me to go all out and make something I feel fabulous in for this special day- thank you!!
I picked up a free pattern a while ago; The Matilda Dress by Simply Sewing magazine. I liked it enough to pick it up but I wasn’t planning to make it any time soon as I wasn’t sure about the line drawings. I realised it had the right features and shape with just a few tweaks. I was hesitant about jumping in as I hadn’t made it before and wasn’t sure how similar it would turn out to the idea in my head. I drew out what I wanted and in which fabric I was considering which helped persuade me it would work.


Fabric
I haven't bought much fabric over the past year and a half, breaking that streak with my special Christmas gift buys including the original Rose Dust tencel twill. I decided to treat myself again to some special fabric for this project and referred to my fabric wishlist. One fabric in there would also be perfect for this dress because it's fluid and floaty Mind The Maker's Viscose. It was expensive- 3 metres for £51 but for a special dress like this it feels worth it. After a bit of mulling, I chose Brick in Night.

Aesthetically, I love this fabric. All the colour combinations and the shapes... like huge brush strokes... it's dreamy. Practically, I hate it, and I wish its expensive price was reflected in its composition. Yes, it's beautifully drapey and soft, but it snags like nothing else. My Atelier Brunette viscose didn't snag like this, and even if it had, it would have been less of a problem... Brick is dyed only on one side so when it snags it pulls the undyed white thread through, making it super visible. Whereas Atelier's wrong side is completely dyed.

Tip: use your most delicate pins for fabric like this. I started with my normal pins and quickly realised this was a huge mistake. My very very fine glass headed pins made such a difference but even they couldn't avoid snagging. Also use a microtex sewing machine needle, I used size 60- the smallest I could see- and got through 3 needles!

Tip: I used clips to help bring the selvages together and stabilise the fabric for cutting (although I did a lot of cutting on one layer of fabric too).
Snag #1 while cutting out:

Snag #2 happened when I unzipped my invisible zip after I had sewn one side. The invisible zip was going so well until this happened, I was pretty devastated. It slowed down my sewing so much and I have no idea how it caught on it. I tried to fix it by using a pin to gently pull back threads but it was too far gone.

I cut out a whole new back bodice but decided when seeing them together that they were very samey. As I was cutting these out of my leftovers, I couldn't find a piece of the same pattern again to replicate them and on top of that they were basically the same part of the pattern repeated which looked too un-random. So I paired the new back left with the old back right. I will hopefully use my spare back pieces to make a willow tank where I can make a deep back seem and hide the snag.


Modifying the pattern
To make it less everyday I knew I wanted some kind of skirt split, either centre or off centre on one leg.
To add occasion I lengthened the skirt to maxi.
I shortened the bodice in order for the waistband area to hit me at my high waist and therefore added 6” plus hem allowance to the skirts.
Instead of a tied waist, I inserted elastic into the waist channel as well as into the sleeve hems. The pattern makes separate cuffs and elastic for the sleeves but this seemed overly fussy. The length of the sleeves seemed too long as they were therefore I didn’t think I needed to add any extra length, but they could do with being a few cm longer in the end.
An off-centre split was calling me, so to do this I made some more pattern pieces. The skirt pieces were both Cut 1 on Fold. By making a new pattern piece the whole Front Skirt has to be Cut 1 (not on the fold).
I made one piece that was 1.5 times the size of the original Front Skirt, just by adding half of the Skirt onto the original and taping together. I then cut out another Front piece half the size of the original Front. (Tip: my skirt pieces were not a perfect rectangle, they have some shaping at the seam side you an see below. Therefore, for the Split pattern piece, I had to make sure I was repeating this part of the skirt in a mirror image). I added 2cm seam allowances to either side of my split (next time I’ll add bigger to make finishing the seam easier).

I decided I wanted the slit on my right leg, so just flipped my pattern pieces over and placed them on the Right Side of a single layer of fabric.
Pattern "matching"
I decided I wanted to keep the flow of the pattern rather than literally match any rectangles, for example try to do something like this, where the bodices are in the same area, and that is the area directly above the skirts which are both in the same area.


It was easy to match across the Front split because I could lay the pieces next to each other:

Sadly, I couldn't use the fabric to the left of where I had cut my Front Skirt for cutting out the Back Skirt because there was that big snag in the way. It would have been so handy because it was the right shape and the right area of pattern too. Instead I ate up more of the uncut fabric elsewhere- I hate not being able to use up all fabric in the same area before I move on! Later, I cut my bodices out of this leftover area because I could avoid the snag with their shapes.


Sewing
A bit more of a detailed process is on my Instagram story highlights.
Bodice
Sewing began with the collar. I added my button and elastic closure first before I sewed it to my neck.


Installing my invisible zip


You can see my hand sewing stitches extending beyond the end of my machine stitching- don't do this at this point in time! This wedged my zip in between my seam and made it unreachable.


Bias binding raw edges and zip tape together:

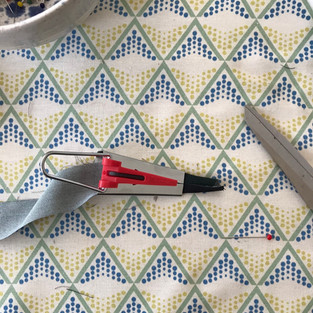


I made my own bias binding for the first time using a little gadget I received for Christmas. So much fun! Although I will say it was quite hard to get the folds even on each side. I used only the scrappiest pieces of my fabric for this so I wasn't eating into my proper Leftovers that I can use again for a garment. I also did away with any kind of grain line.


I used my zip foot to sew the bias on so that it could skim past the zip pully when needed. It worked very well.


I used a different method for installing my zip by following this tutorial for the "perfect" installation.
The tip works by using a zip longer than you need and by sewing the seam below your zip first to avoid any bumpy joining. My zip wasn’t anywhere near as long as theirs, and at first I got myself into a pickle. Be wary of sewing your zip tape to the seam allowance below where the back seam starts. I continued to hand sew my zip tape to the SA all the way to the end of the tape on both sides, but by doing this I caught my zip pully in-between the zip tapes and the seam, unable to reach it with tweezers and pull it up. All I needed to do was undo my extra hand sewing so that I could access the pully and pull the zip closed. Once done, I could then finish hand sewing the zip tape to the seam allowance to keep it neat. The zip won't be going down below the seam anyway.
Also, it was so much easier installing this zip before joining the shoulder seams!
Attaching the collar


I hand sewed my collar closed, the stitching from thE right side would have been quite obvious on this fabric and I felt like I had more control this way. My collar didn't quite meet its seam perfectly all the way round, so this way I could make sure it did. I then re-ironed the fold at the top which had to be re-done in places to be even.


At this point I tried on the bodice for fit. It fit well, but the collar wasn't as high necked as I imagined it to be. It stuck out more and was wider too- you can see this here:

Sleeves
I chose to French seam all my seams as this fabric is so fray-prone and delicate.


I folded over the sleeve hems 1cm then 1.5 cm for elastic (1.1cm wide and 7.5cm long).

There was quite a bit of unpicking involved when sewing my sleeves to my armholes. I re-sewed my first sleeve because I had forgotten to trim the raw edge down after seam 1 and loads of strands poked out through seam 2.


I made a bit of a mistake french seaming my second sleeve. Having just finished my first, I got confused and did right sides together instead of wrong sides:


Skirt
Finishing my side split
I sewed my Front skirts together before attaching them to the bodice. In order to create a clean finish on the split I finished my raw edges before sewing the seam. I folded each raw edge under 0.5cm and pressed, then 1cm and pressed again. This was the easiest way I could think of neatly finishing their raw edges. I didn't have enough fabric to bias the seam like I did with the zip, and I think this would be too heavy anyway.


I then joined Skirt Fronts right sides together from the waist down, choosing to sew quite a short seam so that once the dress was constructed I could try it on and choose the height of my split.


Putting it altogether: joining bodice and skirt
Waist seam #1: French seamed the skirt and bodice together.


Outside view at this point:


I was a bit frustrated at how closely I had missed some pattern matching across the waist seam. Matching here was entirely unintentional though so this was just a coincidence. And luckily once the elastic is in, it looks less of a near miss and more continuous.
Waist seam #2: channel for the elastic
Put Skirt and Bodice right sides together (I tucked one inside the other). This bit was quite tricky because of the way the bodice dramatically angled inwards as you can see above, whereas the skirt remained square. As this seam had a 3-4 cm seam allowance, there was therefore too much skirt for the bodice and some easing was required.
I did half the seam then unpicked it all because I couldn't get rid of some folds where there was too much skirt to bodice ratio. I decided to sew the channel with a smaller seam allowance to help with the distribution of extra fabric, my elastic was quite thin anyway so I could do this. This was more of a deal than it would be normally because the fabric clearly shows where it has been sewn before. I was also terribly conscious of revealing any snags that had been made by the sewing machine.


Seam #3: topstitching the channel
The flappy bit of channel created then needed to be kept in place by flipping it upwards and top-stitching over the bodice from the right side. I chose a 2cm SA, (could have been wider but I wanted to limit the chance of unpicking and the closer I sewed to the edge of the channel the more likely it would accidentally not get caught by the machine).
It was quite tricky to keep this line of stitching straight as I didn't have visual access to my sewing plate's gauges as the skirt was covering them (see blow). I used my handy 2cm measure but this really required a third hand- so I would stop every now and again and check I was on target but mainly eye-balled it.


Inserting elastic:

The first time I inserted the elastic I got it twisted, despite checking that it was not...
It was so exciting inserting the elastic because all the dress was done except for the hem and it made such a transformation. The dress was just a big shapeless sack beforehand and the elastic worked its magic.


It was such a great feeling trying it on and seeing what you imagined concretising before your eyes. I actually raised the side slit from what I had originally sewed to be begin mid-thigh. It felt so comfortable and elegant at the same time- formalwear goals.
My last bit of sewing was the hem. I made quite a narrow little hem, wanting to keep the length for formality.


My graduation day was very cold and windy (with some sun). I have to say I was pretty cold in this dress even with my gown and woolly tights, which was quite unpleasant because I really feel the cold. I blame holding graduation in February rather than my choice of fabric... But putting aside its propensity to snag, this fabric was the perfect fit. The dark colours really lend themselves to a wintry look and yet at the same time it could be worn in British summer as it's light and airy with that split.
Although this fabric is probably the nicest patterned fabric I've ever seen, I won't be buying any of the other colour-ways or cool designs. It's not worth the hassle and isn't as good quality as other viscoses such as Atelier Brunette.


I'm really pleased with the outcome of this project. I had started thinking about what to make for graduation months ago and thought I would be prepared in advance but was classic last minute in the end. For those interested in timelines; the fabric arrived on 24th Jan, I didn't get time to cut it out until the 2nd Feb, finished cutting it out on the 5th and started sewing. I finished sewing it on 12th and hemmed it on the 13th. I sewed in every spare moment to get it done in time, and had to finish it a week in advance due to needing to sew a present for the following week afterwards (which I'm pleased to say I completed too!)


It was a little bit of a me-made celebration which was lovely- seeing David, my dad and Grandmother all wearing clothes I had made them, and David's Fairfield's first outing. It goes marvellously with his Foreman which repeats the navy and terracotta duo but inverts them with fabric and buttons- completely unplanned on my part.
I can definitely see myself making more of these dresses in less fussy fabrics which would make the process a whole lot quicker. Even some stretch fabric like a stretch velvet would make a really cool Frosting project.
Pattern: The Matilda Dress by Simply Sewing Magazine (s. 6)
Fabric: 3m of Mind the Maker's Viscose in Brick Night (Sew me Sunshine)
Mods: Maxi length, side split, elasticated waist and cuffs.
A more detailed process is saved in my Story Highlights on my Instagram under "Grad Dress 1 & 2".


Comments