Merchant and Mills' Strand Coat
- Cora
- Sep 14, 2019
- 6 min read

Updated: Jan 6, 2020


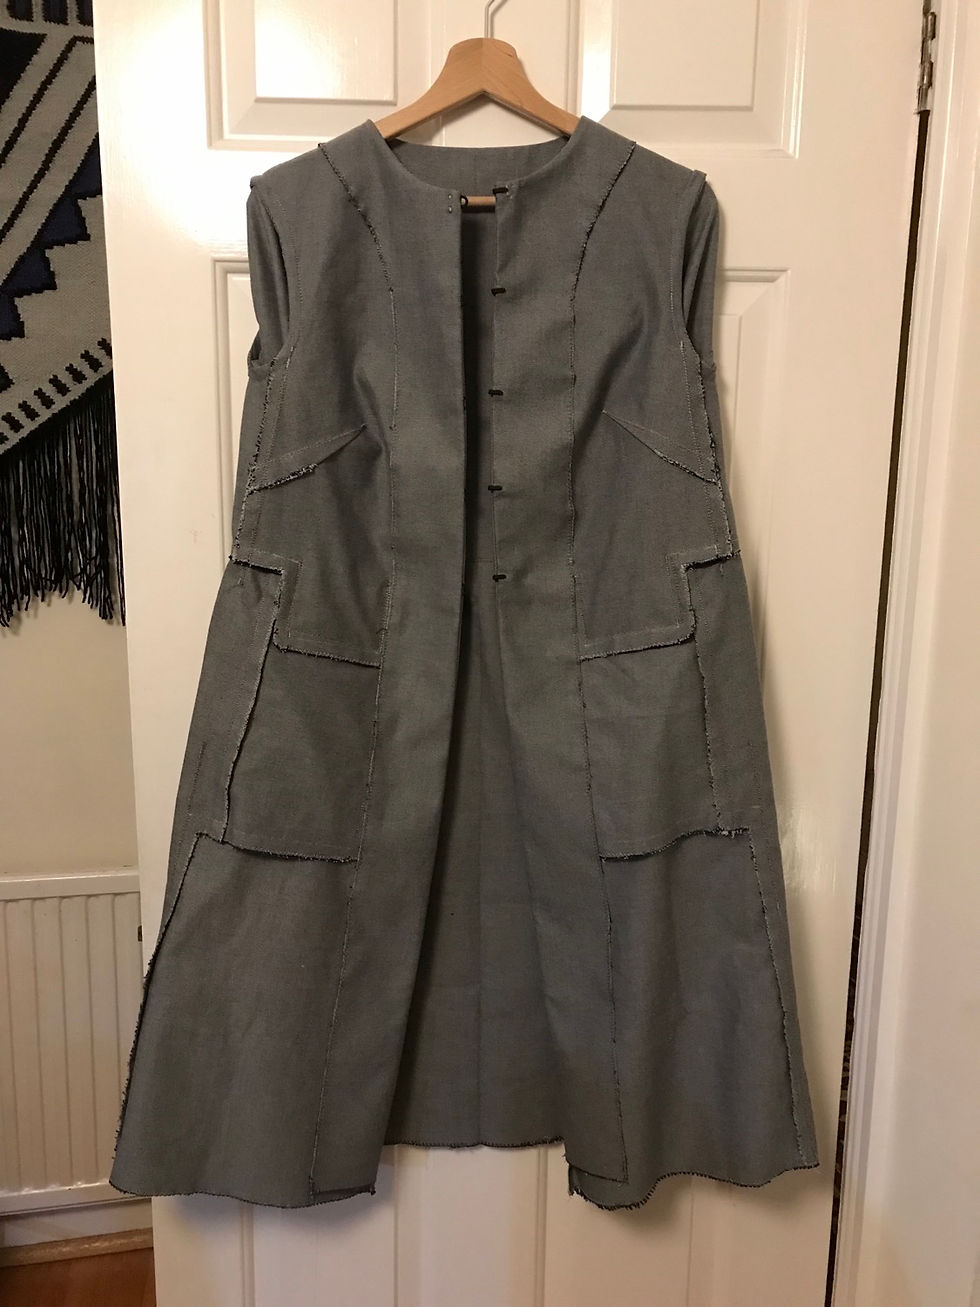
I’ve had the Strand Coat cut out for over a year, it's come with me on my move to Bristol and stayed in my basket full of other cut out items. Recently I've made an effort to get through the pile of cut outs in that basket, and so far I've completed eight; two jackets, a jumpsuit, pair of trousers, shorts and three tops. I've been using the hashtag #sewyourcutouts on instagram to encourage (mainly myself) and others to get through our backlogs, you can see details of these makes saved in my highlights.
Fabric & thread
I used a heavy cotton 'denim weave' for the Strand from Fabworks. The name is misleading, it's nothing like denim! I wasn't sure about it to begin with, since the weave creates a checkerboard style finish in miniature, and I just don't like chess board checks. But in fact, it's so small it's not noticeable and I really like the feel of the fabric, its smooth handle and the overall impression from further away.

I bought thread especially for topstitching for the first time! It wasn’t topstitching thread but ‘extra strong’ as this type came in bigger spools that was more for your money’s worth. I didn’t have the fabric with me the at the time to choose colours so I just went with one I liked that I could use again and I thought might go- a burnt orangey/brown. It was so incredibly satisfying topstitching with it, just something about the thick thread was so fun. It was the first time I’ve savoured each bit of topstitching, and fortunately there’s quite a lot with this pattern.


The pattern
I was a little worried from looking at the instructions that this would be convoluted -especially sewing the pockets and facing (because of the hook and eyes which slot into the facing). There are four pockets; two in seam and two tiny wee ones created out of the horizontal seam of the bodice and skirt that are a bit pointless but make beautiful style lines. I read the instructions slowly, took my time sewing and it was fine.
I made a size 8. I didn’t make a toile, I’m not in the habit and this was already cut out so I just went for it. Luckily it all worked out okay without any major problems (although I have realised I needed to do a SBA- not really sure it needs darts anyway...). And I did accidentally sew the darts wrong so that I had two Left bodice pieces...

Issues
I found that the facing pieces weren’t the same length after sewing them to the body because more fabric was used on the side that had to go over the hooks, which made it shorter- something to watch out for in preparation for the hem when you have to sew the end of the facing to the body right sides together in order to turn it inside out and get a nice clean right angle at that corner.

This is the what I'm talking about with the hem and a clean right angle. Here I have already cut my right hand facing to be shorter and the same length as my left, so it looks even now:

There was also an odd feature about the dart; the pattern is drawn so that you cut out a section of the dart, and I cannot for the life of me work out what the advantage is. Luckily it doesn't affect your dart, but I just had to zigzag the raw edge together to stop it from fraying....

One thing that annoys me about M&M patterns I’ve found from doing two in a row recently is that they don’t give you any instructions to French seam... Or finish them in any other way than zig zagging. Having said this, The Strand would have been too bulky to French seam or bias bind, so I decided to try and just be as neat as possible with zig zagging and it was fine, the finish doesn't bother me. I actually began with French on the shoulder seams but realised it was too thick.
It would just be nice if they included french seaming or other more elevated finishes as options for people. Their instructions pale in comparison to other Indie pattern companies in terms of detail. The pattern is adequate if you have sewing experience to fill in the blanks, but they could do so much to make them more accessible to less experienced sewers.

The hooks and eyes
When researching this pattern in preparation, this step was the one I was most confused and weary about, but not detailed in people's blogs. It really isn't that tricky if you understand the instructions (re-read them until you do), here are some photos to try to reassure anybody unsure about it. The way the hook n' eyes peek out of the facing is really neat and makes a really nice finish, I recommend the extra effort.
Line up your hook and eyes (on each side of the body) according to the notches and hand sew them into place. The hooks will be sewn into the seam allowance like this, away from the edge, because the facing is going to be sewn with a SA of 1.5cm. You also want them to be facing this way with the hook pointing left because they will end up being on the inside once you turn the facing out (sorry, hard to explain).

Here I'm showing you what it looks like after you have sewn the facing on and the eyes are sandwiched in-between the body and facing. The eyes were easier to install because you could basically sew over them with the machine as they are quite flat. They were also easier to get the placement right because you line the wrong end of them up with the raw edge.


These are the hooks- I used some tailor's chalk to guide my sewing, and you must stop and start in between each hook. Once you have turned the facing to the right side, you can then hand sew the gap closed between the facing and body over the hooks.


In this photo, my finger is showing how far the hooks are extending beyond the seam line (which you can see in purple).
Once you have turned the facing to the inside, the hooks then can be pushed through the gap and poke out like this, with the hook going back on itself:

Just be careful to sew them with exactly the same amount jutting out beyond the seam because otherwise you’ll create an uneven gap when you come to do them up.
Finishing the facing
The pattern tells you to anchor the facing in several places around the shoulders, but it's so long and billowy I was sure that it would hang out if I were to wear the coat undone, which I'm sure will be a lot (yet to wear it out the house). For this reason I decided to invisible hand stitch the whole facing down, the length of the coat, and all around the back neck.

It took me a while to pin it down flush with the body and make sure there were no weird folds or pulls. I hung the coat up on a hanger in order to replicate the way it will hang when I wear it, and pinned it in this position. There was an area around the pocket/waist line that was a bit tricky and I wasn't sure if it was ever going to lie flat, but I'm really happy with the end result and my stitches are not noticeable!

It took a long time to stitch but was enjoyable. I chose a light grey colour to match the lighter weave and made sure I was coming through to the right side in a light square, doing the tiniest 1mm stitch on the right side and making longer stitches between the body and facing, so they are hidden from the inside too. The weave really worked in my favour here, with the checks disguising any stitches becuase they distract the eye, it might not be so easy in a plain colour.
Other alterations
I didn't change the length of the Strand, and really like the length, even though I'm shorter than the pattern would have been designed for (5,1). I did change the length of the sleeves though, bringing them in several inches:

I decided to finish the hems by topstitching from the outside, which I've never done before, it felt a bit like sewing blind, not being able to see my raw edge and use that as a SA guide, but I just made sure it was even all the way round and I was sewing half a sewing foot away so that I could monitor it from the right side, I used washi tape and stuck it to my machine.

Final thoughts
I'm really pleased with the result and this was not as hard as I thought it would be. My one regret is not adjusting the dart, which is noticeable when done up, but it was already cut out... Yet another reason not to go mad with cutting out fabric in advance. The shape of the flat collar/neck and the hook and eyes are a really unique look and I love it. It would be great in linen- one day!


Pattern: The Strand Coat, Merchant and Mills, size 8
Supplies: Fabric, interfacing, 5 hook and eyes, topstitching thread (optional).


Comments